
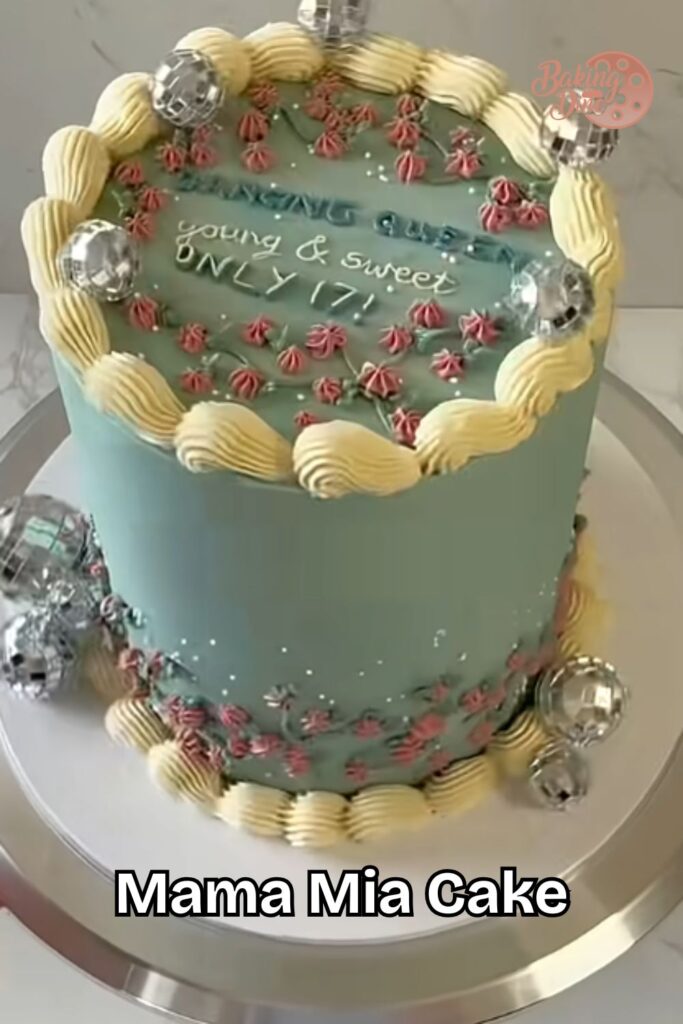
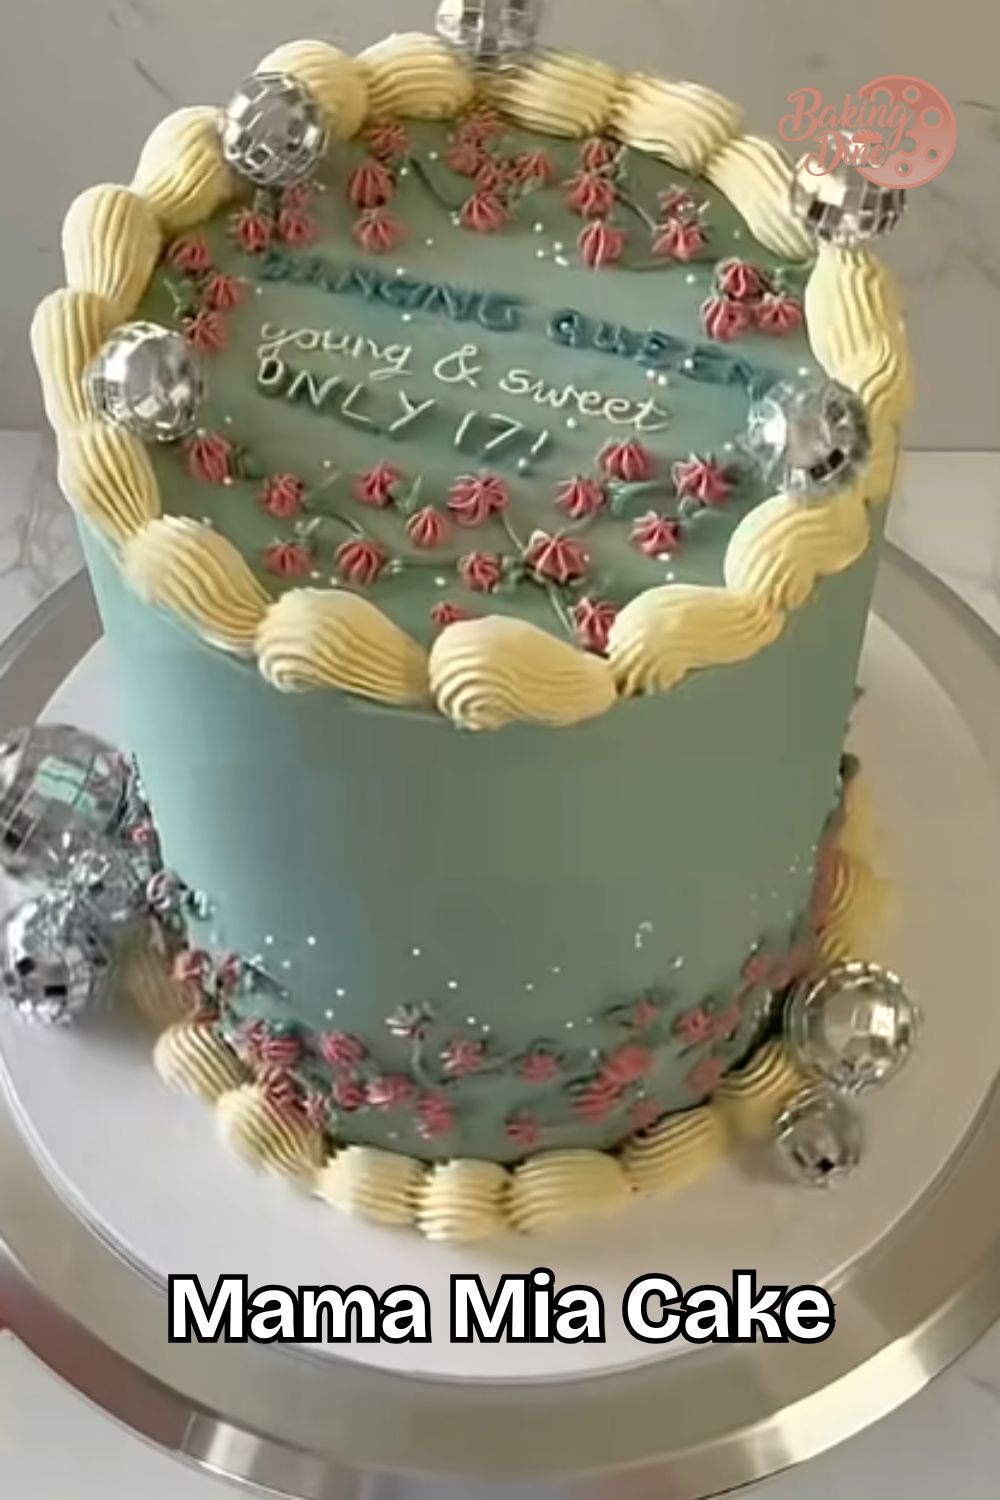
I love baking a Mama Mia cake for every birthday party. This colorful cake always makes kids smile. You do not need to be an expert baker to try it. Just follow a few simple steps, and you will do great.
This cake looks fun, with bright colors and cute toppers. It tastes soft, sweet, and full of joy. You can even add a disco ball topper for extra fun. Class two kids can help you make this cake too.
In this guide, I will share my easy recipe. So grab your bowl, and let’s start baking a Mama Mia cake today.
Why You’ll Love This Recipe
This Mama Mia simple cake is easy to make at home. You do not need fancy tools or skills. Just a few basic steps, and you are done. Kids love the bright colors on this cake. Parents love how quickly it comes together.
It works great for birthdays or any small party. You can also change the colors or toppers. This makes the cake fit any theme you like. Simple steps, happy results, every single time.
Mama Mia Cake Ingredients & Substitutions
Here’s what you need. Nothing fancy, you may have half of it already.
| Ingredient | Amount | Substitute Options |
| All-purpose flour | 2 1/4 cups | Gluten-free flour blend |
| Baking powder | 2 1/4 teaspoons | Cannot skip, keeps cake soft |
| Salt | 3/4 teaspoon | Regular table salt |
| Unsalted butter | 3/4 cup | Salted butter, less added salt |
| Granulated sugar | 1 1/2 cups | Coconut sugar |
| Large eggs | 3 | eggless version |
| Vanilla extract | 1 1/2 teaspoons | Vanilla paste |
| Buttermilk or milk | 1 cup | Plant-based milk |
| Butter (for buttercream) | 2 cups | Margarine, softened |
| Powdered sugar | 300g | Cannot skip, gives buttercream shape |
| Milk (for buttercream) | 2 tablespoons | Cream, for a richer taste |
How to Make a Mama Mia Cake
- First, heat your oven to 350°F. Grease two round cake pans well. Line the bottoms with parchment paper too.
- Next, mix flour, baking powder, and salt. Arrange this bowl aside for later. It only brings a minute.
- Then, beat butter and sugar till fluffy. This needs about three minutes total. Add eggs one at a time slowly. Mix in the vanilla extract too.
- After that, add flour and milk in turns. Start and end with the flour mix. Mix softly, don’t overmix the batter.
- Bake for 30 to 35 minutes total. Check with a toothpick in the center. It should come out mostly clean.
- Meanwhile, cool the cakes on a rack. Wait ten minutes before removing them. Let them cool completely before frosting.
- Finally, spread buttercream between both layers. Cover the top and sides fully. Add color or toppers as you like.
Pro Tips
- Use a topper printable Mama Mia cake design for a quick, fun theme.
- Chill your cake before frosting. This stops crumbs and helps the buttercream spread smoothly.
- Pick gel color over liquid color. It keeps your frosting thick, not runny.
- Level your cake layers with a knife. This gives you a flat top for stacking.
- Print your topper on cardstock. It holds shape better than thin paper.
- Add the topper right before serving. This keeps it crisp and colorful.
- Store leftover cake covered. It stays soft for up to two days.
Mama Mia Cake Ideas & Popular Variations
| Cake Style | Best For | Fun Detail |
| Mama mia disco cake | Dance parties, teen birthdays | Shiny sprinkles, bright colors |
| Mama mia cake 17 | Milestone 17th birthday | Gold accents, bold numbers |
| Simple pastel design | Small family gatherings | Soft, calm color palette |
| Bright rainbow layers | Kids’ birthday parties | Colorful layers inside too |
| Buttercream flower design | Elegant celebrations | Piped flowers on top |
| Two-tone drip cake | Modern, trendy parties | Chocolate or candy drip |
Troubleshooting
| Problem | Why It Happens | Quick Fix |
| The cake sinks in the middle. | The oven door opened too soon | Wait until baking time is almost done |
| The cake is too dry | Too much flour or overbaking | Measure flour carefully, check the cake early |
| Buttercream too runny | Butter too soft or warm | Chill bowl for ten minutes, then whip again |
| Buttercream too stiff | Butter too cold | Let the butter soften more before mixing |
| Cake layers uneven | The batter spread unevenly in the pan | Use a scale or spread batter evenly by eye |
| Frosting looks lumpy | Powdered sugar not sifted | Sift sugar before adding to butter |
| Cake sticks to the pan | Pan not greased enough | Grease and flour pan fully, use parchment too |
Final Thoughts
Let me be honest, this Mama Mia cake is easier than it looks. A few simple steps, and you get a real showstopper. That soft crumb and creamy frosting never disappoint anyone.
So plan ahead when your next party comes up. Print your topper, gather your ingredients, and get baking. This cake fits birthdays, milestones, or just a fun weekend treat.
Your family and friends will remember this cake. Give it a try, and see the smiles yourself.
Mama Mia Cake
Ingredients
Method
- Preheat oven to 350°F and grease two round cake pans
- Whisk flour, baking powder, and salt in a bowl
- Cream butter and sugar until fluffy, then add eggs and vanilla
- Alternate adding flour mix and milk into the batter
- Bake 30-35 minutes until a toothpick comes out clean
- Cool completely, then make the buttercream frosting
- Frost between layers and over the top and sides
- Add your printable topper and serve